Showing posts with label veggies. Show all posts

Thursday, June 3, 2010

Caramelized Onions - Success!

I keep on doing this, where I let a week or two go by without posting, and then post about 6 recipes at once.
I decided to give caramelized onions another try.  I got the idea from the broccoli recipe, and then decided that they would also be delicious in a strata.
I started with the strata.  I had gone to my Take It Away (best sandwich shop ever), and of course, I couldn't leave without buying a bag of their bread ends.  This time I think there was even more bread than the last time!  Which turned out to be a good thing.  The recipe called for 1/2 lb,
so I cubed it,
and since it was still really soft and fresh after sitting out for a day, I decided to toast it.  I had the onions caramelizing, stuck the bread in the oven, and sat back to watch tv.  Then I promptly forgot about the bread.  I wasn't worried about the onions, since they were on very low heat.  After a little while, I started to think I was forgetting about something.  Then I remembered the bread!  I expected to find little black mounds where each cube was, but they actually didn't burn.  They became perfect croutons.
And then I turned them into breadcrumbs.  Kind of coarse, but still good.
So now that the first batch of bread cubes was unusable, I was very happy to still have a lot of bread left.  This time I set a timer, in case whatever I was watching on tv (most likely Gilmore Girls reruns) sucked me in.
This strata was just as delicious as the others I have made.  I actually think this was the best yet!  I followed my favorite recipe, except I used fresh herbs (basil and rosemary), the dairy I had on hand, caramelized onions, and fresh tomatoes.
I made the mistake of making this two days before going out of town for a long weekend, so I decided to bring it with me!  It was definitely a hit with my grandparents!

Recipe: Caramelized Onions
Ingredients:
3 medium red onions, sliced thinly
1 tbsp oil
1 tbsp butter

Directions:
Heat the oil and butter over medium heat in a large skillet.  Add onions,
and cook until they are starting to soften.
Turn down the heat and cook for 2-3 hours or until caramelized, stirring occasionally.
Then use with everything!

Recipe: Strata with Caramelized Onions, Tomatoes and Goat Cheese (adapted from Baking and Books)
Ingredients:
1/2 lb artisan bread, cubed
Caramelized red onions (the equivalent of 1-2 onions)
4 cloves of garlic, crushed
1/2 tsp red pepper flakes
3 medium tomatoes, chopped
1/2 tsp sea salt

6 large eggs
1/3 cup heavy cream
2/3 cup whole milk
2 tbsp fresh basil, julienned
2 tbsp fresh rosemary, minced

1/4 lb goat cheese
1/4 cup freshly grated Parmesan

Directions:
Preheat oven to 450 degrees F.
If your bread is still soft, toast it for a few minutes.  Don't forget about it like I did!
Caramelize the onions, as above.  If using pre-prepared onions, then reheat them now over low-medium heat.  Add the garlic and red pepper and saute for a minute.
Add the tomatoes and salt and bring to a simmer.
Stir the bread into the mixture.
In a medium bowl, whisk together the eggs, cream, milk, basil and rosemary.
Pour the bread mixture into a 9x9 glass baking dish (or something of a similar size).
Crumble the goat cheese over the bread,
then pour the egg mixture over everything
and sprinkle with the Parmesan cheese.
Bake until the strata has set and is golden on top, about 25 minutes.  Let rest for 5 minutes before serving.
Refrigerate leftovers - they can last up to a week.

The next night, I still had a lot of caramelized onions left, and decided to use the original recipe I had found.  This is now my favorite way to eat broccoli!  You really have to try this.  The onions are so sweet, they make you think you are eating something decadent.
I didn't have any pine nuts on hand, so I toasted some slivered almonds instead.  They tasted so good, I might just use them every time I make this recipe.
The recipe said that it made 4 servings, but I honestly ate all of this myself!

Recipe: Broccoli with Caramelized Onions (from Baking Bites)
Ingredients:
Caramelized red onions (equivalent of 1-2 onions)
1 head broccoli
1/4 cup toasted slivered almonds
2 tbsp balsamic vinegar
s&p to taste

Directions:
Make the caramelized onions as above, or reheat (in a pan) some that were previously made.
Boil a salted pot of water.  Add broccoli and cook for just a few minutes, until tender but still crisp.  And make sure they're still bright green.
Add the broccoli to the pan with the onions, and add the balsamic vinegar.  Toss and cook for a few minutes.  Take off the heat, add the toasted almonds, s&p, and enjoy!

Saturday, May 22, 2010

Orzo with Veggies

This recipe is really good.  And very simple.  That's about it - you'll have to try it with your favorite veggies.

Ingredients:
1 tbsp olive oil
1 zucchini
1 yellow squash
1 tbsp chopped fresh rosemary
5 sundried tomato halves
~ 1/2 cup orzo
1/4 cup feta cheese (mine was tomato and basil flavored)
s&p

Directions:
Cut the zucchini and squash in a large dice.  Heat the oil in a pan over medium heat, add the rosemary, and cook the zucchini and squash until tender.  Chop (or tear) the tomatoes into pieces, add to the veggies.
Salt some water and bring to a boil.  Cook the orzo until al dente.
Toss the orzo with the veggies and the feta, add s&p to taste.

Saturday, April 3, 2010

So much more than just surviving!

Last night, I had one of the best meals ever.  And this was during Passover!  You could say that my standards were low because of the circumstances.  But one of my friends, who is not Jewish, completely corroborates this.

There was a TON of food.  Enough that 3 people ate huge portions, plus had enough leftovers for several more meals.  To start with, we had a crisp, refreshing salad with really yummy raspberry vinaigrette.  Then there was some gefilte fish, for those who were brave enough to try it - I love it!  Then there were some delicious roasted veggies, followed by a decadent lasagna.  And the piece de resistance - a flourless chocolate cake with homemade whipped cream.

I've noticed that whenever I am cooking, especially if it is more than one thing, it takes at least twice the amount of time that I expected it to.  This is why I arrived at my friend's place before 5, for a 7:30 dinner.

First, we started with the veggies.  This is a pretty basic recipe.  Just cut a lot of veggies into similar-sized pieces, toss with olive oil and a little balsamic vinegar, s&p and whatever other herbs you want to use, and bake in a foil-lined pan.  Cook around 350-400, until the veggies are cooked through and have browned/caramelized.

The next recipe is a Passover staple.  This year, I changed it up a bit by adding some pesto.  There wasn't a pronounced pesto flavor, but it really added an extra layer and depth of flavor.  This is another one of those recipes that my mom got from the back of a matzah box.  Those recipes clearly got me through Passover this year!  This is really such a great lasagna.  My non-Jewish friend said that if she didn't already know that there was matzah in it, she never would have guessed.  It tastes just like a regular lasagna.  For some reason, I only make this during Passover.  I'm going to have to try it during the rest of the year, using regular no-boil lasagna noodles, to see if it turns out as well.  And if not, well I do have a lot of leftover matzah!  The original recipe is for an 8x8 pan, but since we wanted leftovers, I doubled it and put it in a 9x13 pan.  I'm including the original ingredients below - if you want to make it in a 9x13, simply double all ingredients.  And feel free to add extra shredded cheese, I did!  My one change - I definitely didn't need as much sauce as it called for.  I used 2 jars that were about 25 oz each, and had leftover sauce.

Recipe: Matzah Lasagna with Pesto
Ingredients:
4 matzah sheets
1 cup cottage cheese
1 cup ricotta cheese
1 1/2 cups shredded mozzarella cheese
1/2 cup grated parmesan
1 egg beaten
1/2 tsp black pepper
a few tbsp prepared pesto, either store bought or homemade
30-34 oz. prepared marinara sauce

Directions:
Reserve 1/4 cup mozzarella and 1/4 cup parmesan.  Mix the remaining mozzarella and parmesan, cottage cheese, ricotta, egg and pepper.
I thought it was so funny the ricotta came out perfectly like this!  It made me think of making sand castles at the beach.

Place some marinara on the bottom of an 8x8 inch deep pan.  Place one sheet matzah over the sauce, top with some of the cheese mixture (smooth to even it out) and some more marinara.  Repeat this to make 4 layers.  With the last layer, before adding the cheese mixture, mix it with pesto.
Then layer it on, as in before, and top with the sauce.  Sprinkle the remaining cheese on top.
Place in a preheated 350 degree oven for 35-40 minutes.  Let cool for 15 minutes and serve with extra sauce on the side.

And now, what you've been waiting for.  The chocolate cake of your dreams.  This cake was so decadent, and so delicious.  The original recipe called for a chocolate glaze, but I opted to make homemade whipped cream instead.  I thought the glaze might be overkill, plus I wanted an excuse to use the mixer!  I had never made whipped cream before, and it was so easy to do.  
I think this cake is the perfect example of good Passover food.  I have had way too many Passover "cakes" that use matzah meal instead of flour, and just have a strange taste and texture.  This is a cake that would be amazing year round, and just happens to work out during Passover.  
Also, this is an example of where it pays off to use good ingredients.  There are very few ingredients, so make sure they are all good ones.  I used a combination of Lindt, Ghirardelli, and Scharffen Berger bittersweet chocolate.  As soon as I rebuild my chocolate collection, I am going to make this cake again.

Recipe: Flourless Chocolate Cake, from Lisa's Kitchen
Ingredients:
10 oz bittersweet chocolate
7 oz (3/4 cup = 1.5 sticks) unsalted butter
2 tsp vanilla extract
5 eggs
1 cup sugar

Directions:
Butter a standard-sized springform pan (9 inches in diameter, 3 inches deep) and line the bottom of the pan with parchment paper to fit.  (Whoops, I forgot to line it!  I cut the paper and everything, but never put it in.  It turned out just fine though.)  If your pan isn't completely leakproof, wrap it well with foil.

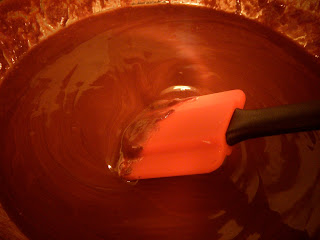
Using a double boiler, melt the chocolate and butter over simmering water.
Once melted, remove from heat and stir in the vanilla.

In a large bowl, add the eggs and sugar.  
Mix on medium speed for about 7 minutes in a stand mixer.

Gently fold in the chocolate, and stir to fully mix, only until the color is uniform.  (The picture below is not fully mixed, I just thought the swirl looked pretty.)

Pour into the prepared pan, and place that on a baking sheet.

Bake in a preheated 350 degree oven for 40-45 minutes, until the edges are fully cooked and the center is set, but a little jiggly (only a little).  A crust will have formed and cracked.  
While it is still warm, run a knife around the edges to loosen.  Let it cool, and then transfer to the fridge if not serving immediately.  I've heard that the flavors are best after a day, so you should make this the night before.  When I first took it out of the oven, the center had puffed up, above the edges of the crust. After cooling, the center sunk.

The next day, not long before serving, I made the whipped cream.  I found online that whipped cream is best within a few hours of making it.  After that, it can start to separate, unless you add gelatin.  I didn't have gelatin, and it lasted fine until it was served.  I noticed later that night, that the leftover whipped cream had started to separate.  It tasted fine, and I just stirred it to recombine it.  When serving the cake, I piped some on as decoration, but left most of it in a bowl for everyone to add to their cake as desired.

Recipe: Homemade Whipped Cream
Ingredients:
1 cup heavy cream
2-3 tbsp sugar
3/4 tsp vanilla extract

Directions:
Make sure that everything is very cold.  Use only refrigerated cream, and try to put the mixing bowl and whisk in the fridge overnight, if possible.  
Add the cream to the bowl.  Starting at a low speed, gradually work your way up to high (no higher than 8 out of 10) speed.  When the cream starts to hold its shape, add the sugar, 1 tbsp at a time.  Right when it starts to form peaks, add the vanilla.  Whip to the desired consistency.  Soft peaks are best when folding the whipped cream into something.  Stiff is best when using to pipe onto a dessert, as I did.  I used a star tip for the dessert, and put the rest of the whipped cream into a serving bowl.